AIO - Assembly and Manual Mode
Assembling the AIO and the Basics of Getting Started

Jeff Hintt
Last Update 5 jaar geleden
The basic in's & out's of the All In One unit and what its comes with
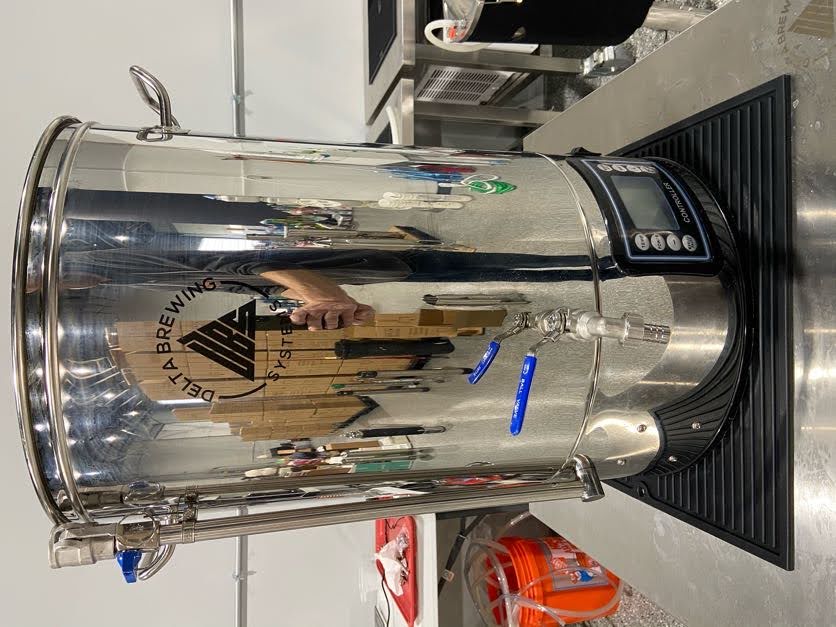
First off, thank you very much for your purchase of the All In One mash & boil. We know you have the included instruction manual, but this is here to provide a better look at what your unit came with and how to get the best experience from it.
What's in the box!!!???
- The All In One Mash & Boil
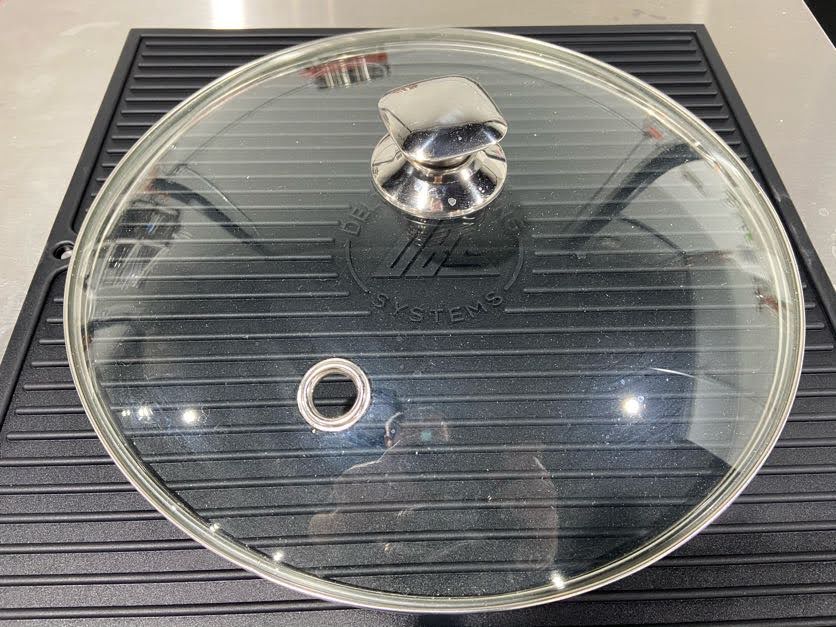
- A Glass vented lid
- A stainless hop spider
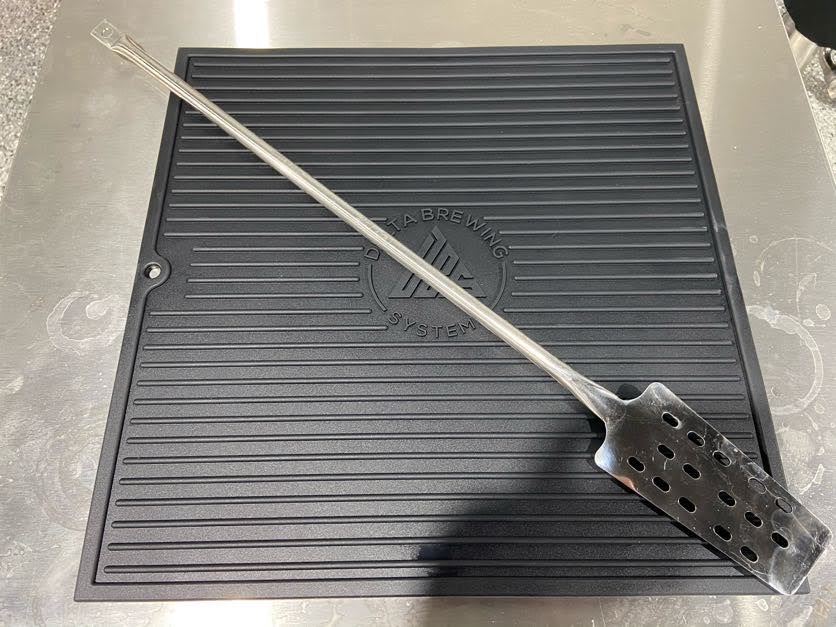
- A stainless Mash Paddle
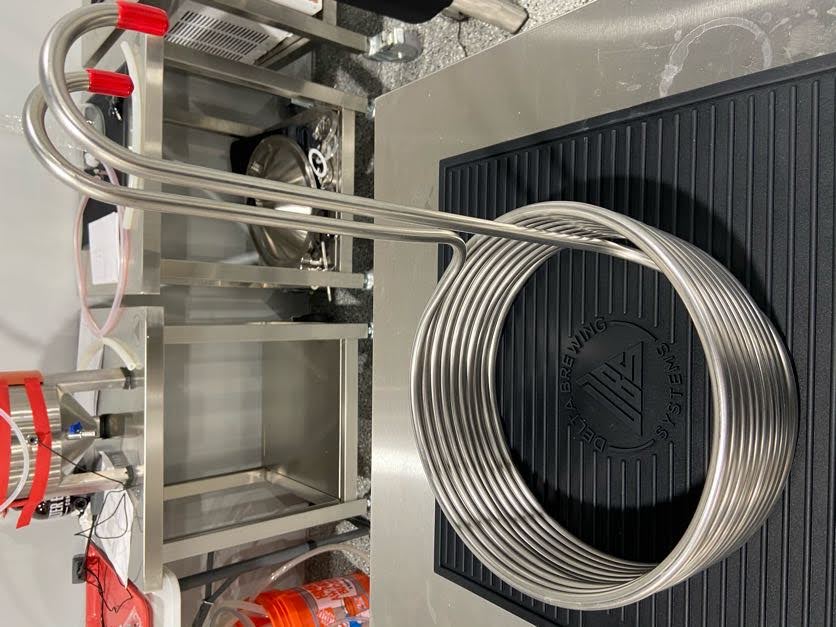
- A Stainless Wort Chiller (hose & fittings not included)
- A whirlpool arm
- A recirculation arm
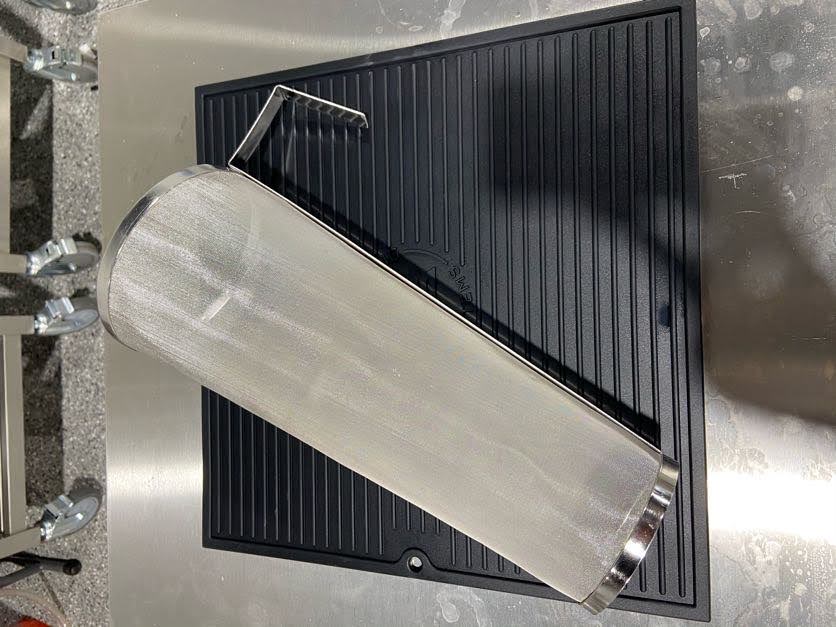
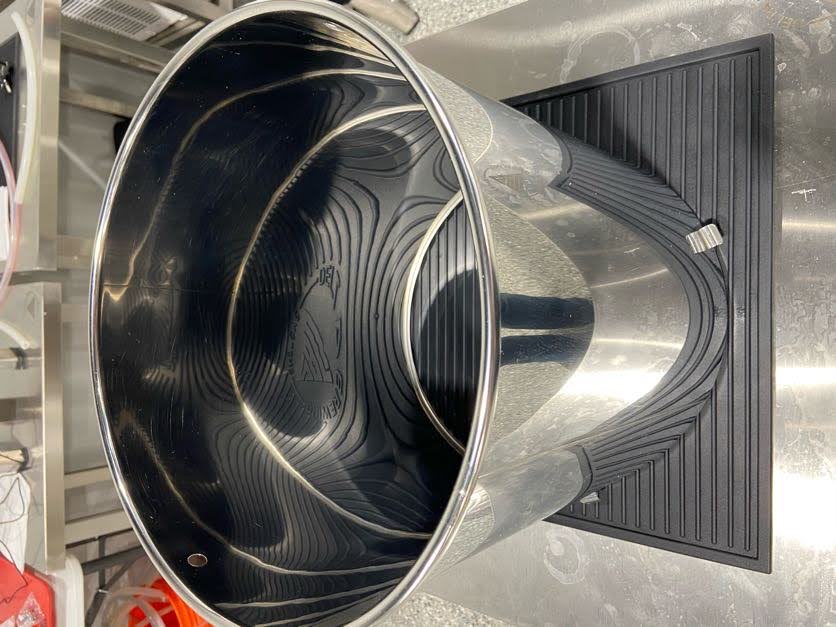
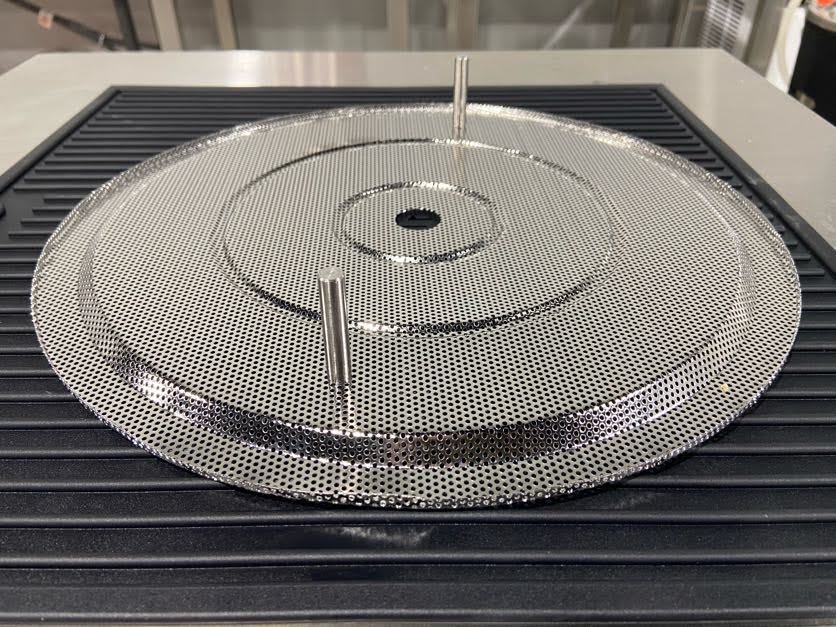
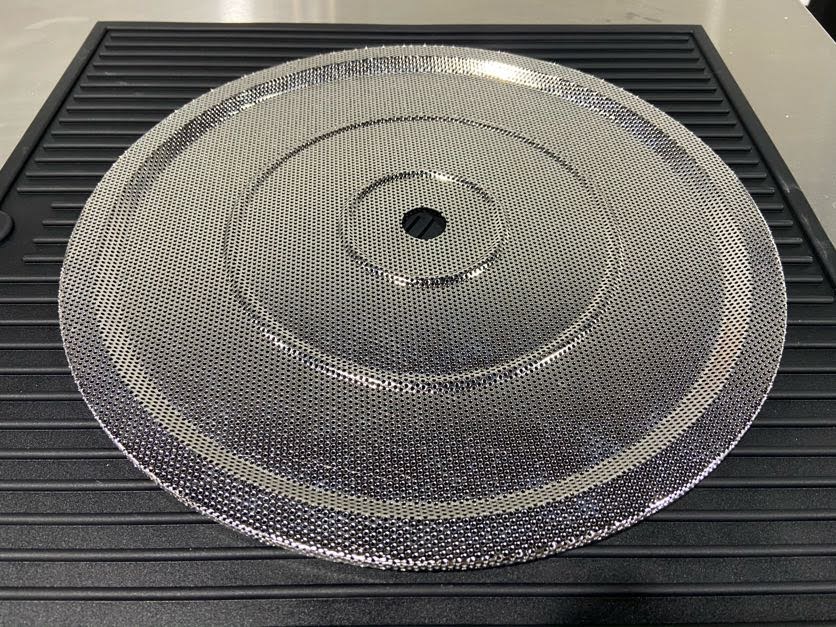
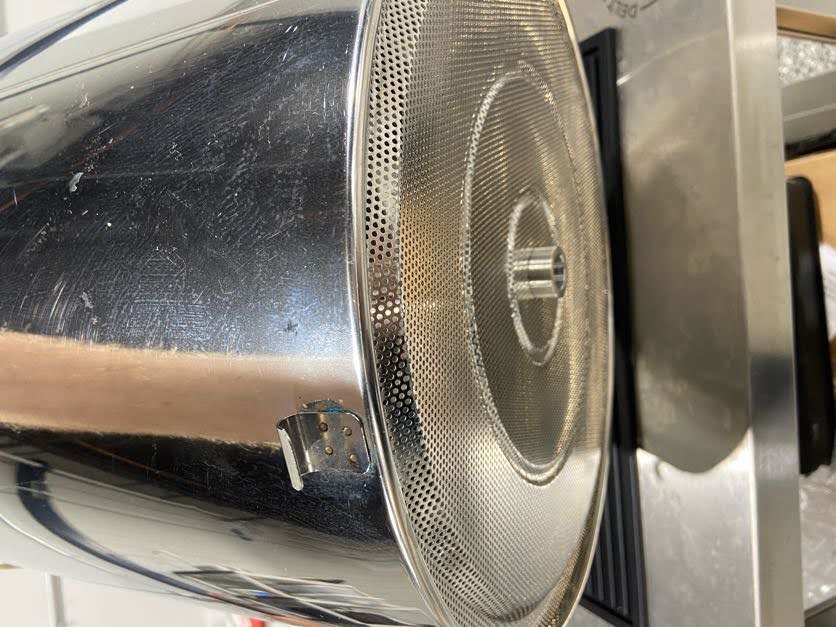
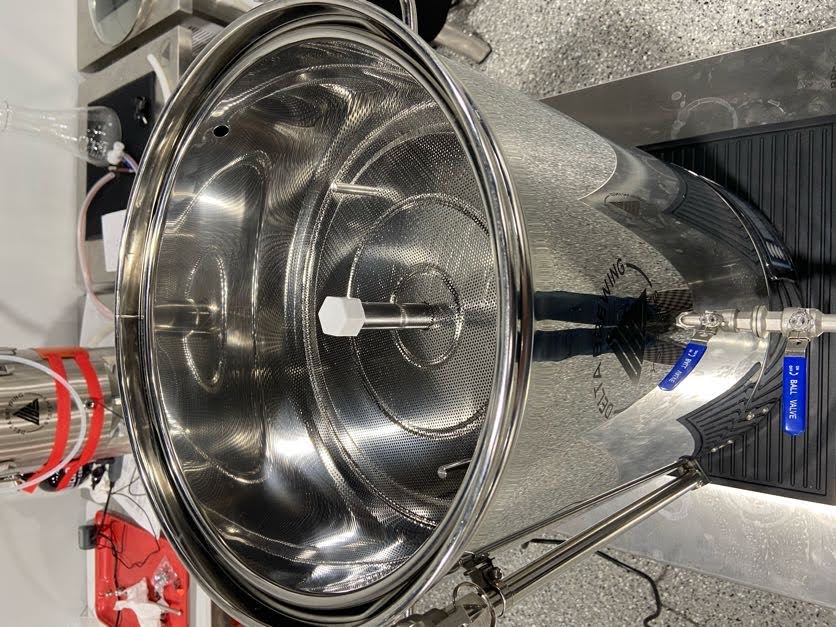
- A removable grain basket that also acts as your strainer and false bottom.
- A handle to lift your grain basket
- A Neoprene Jacket to insulate your AIO unit and help keep those mash temperatures stable.
- An extra silicone elbow and some zip ties. (these are spare parts for the internal pump.)

ASSEMBLY
The only real work you'll have to do is to put your grain basket together.
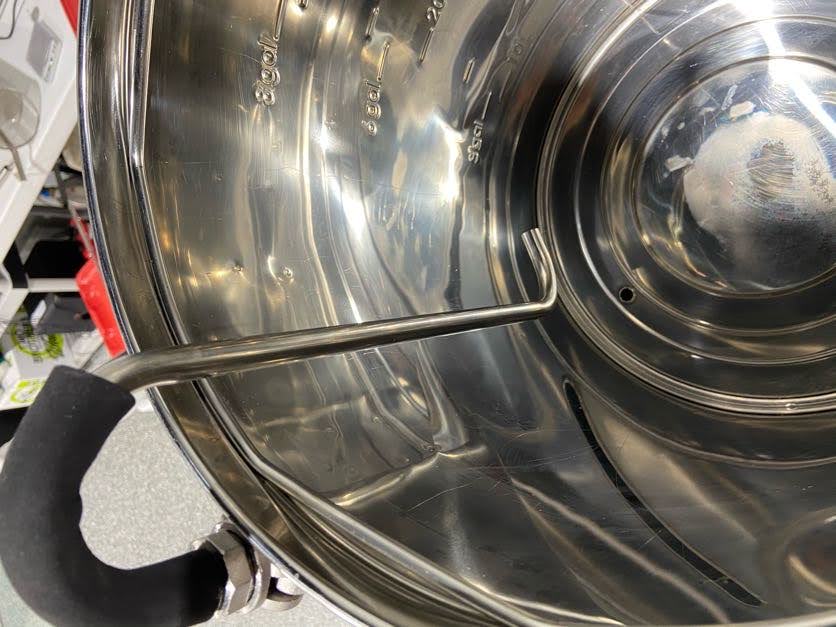
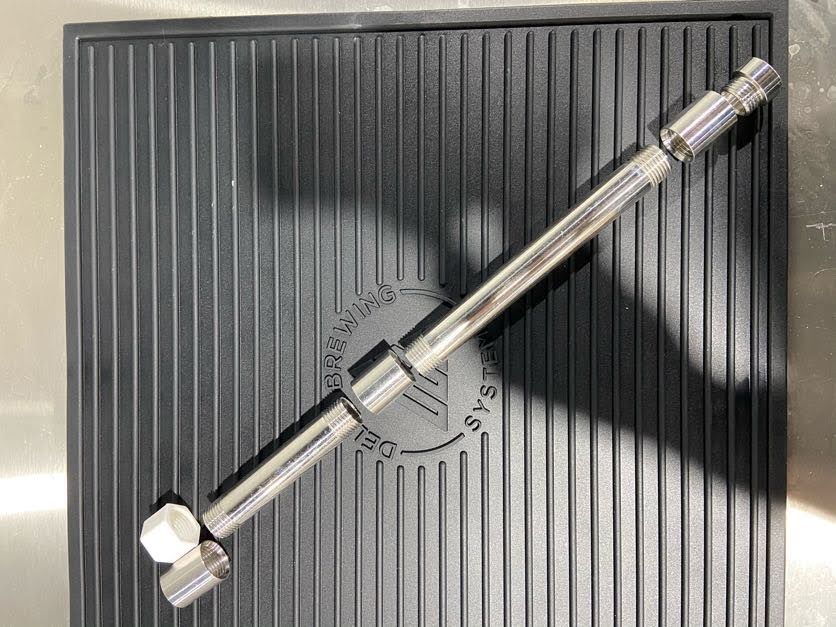
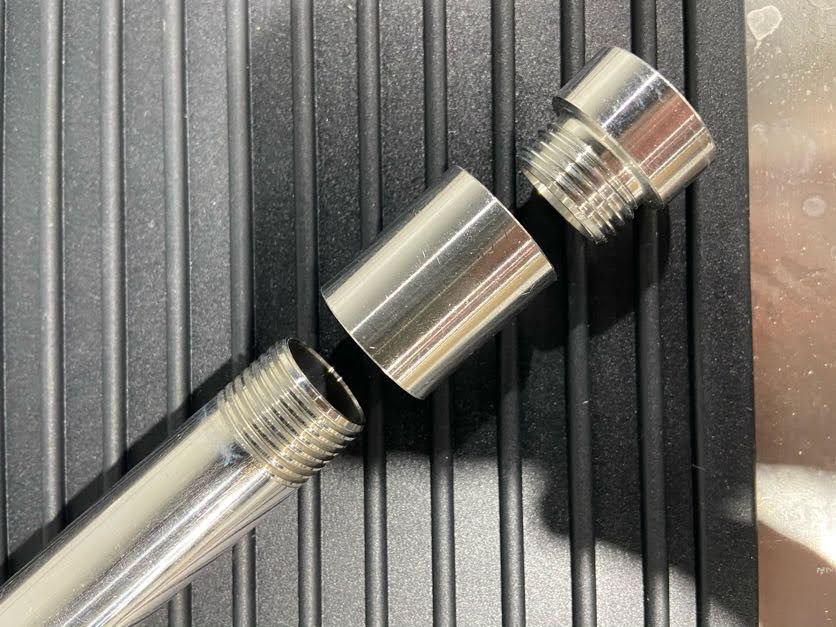
To start, you'll need the bottom two stainless pieces of the threaded pipe that will support your basket.
(There is no need to use sealant or threaded tape. You aren't looking to create a watertight seal.)
The bottom lid is the one with only one larger hole, you'll want the lip of it facing down so it fits right into the lip of the basket.
The threaded portion of the bottom piece of the pipe will go up through the hole and you'll thread on the next piece which is threaded internally on both sides. The bottom of your screen should look like this.
Next, you'll take the longest section of pipe and thread it into the two sided threaded collar as well as threading the next two sided collar on top of the pipe you just added. It should now look like this.
(You don't have to use both pieces of pipe if your grain bill is small enough to require just using one. The size of the basket can be altered to fit your recipe.)
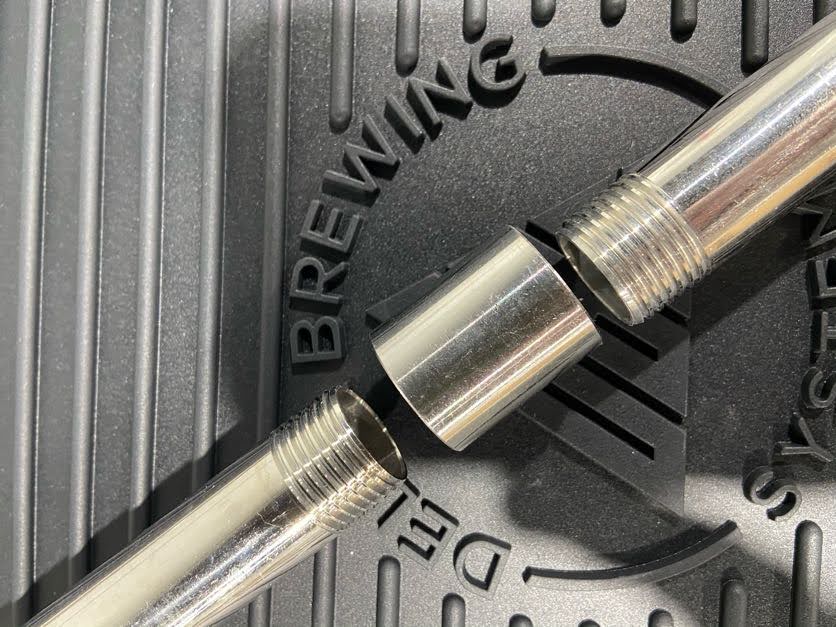
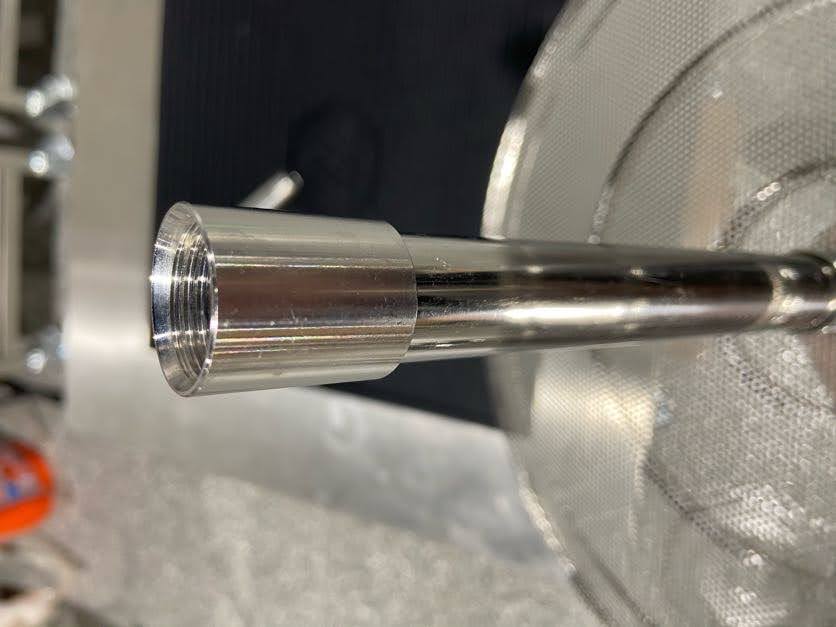
Now take your last portion of pipe and thread it into the two sided collar that is attached to the larger pipe.
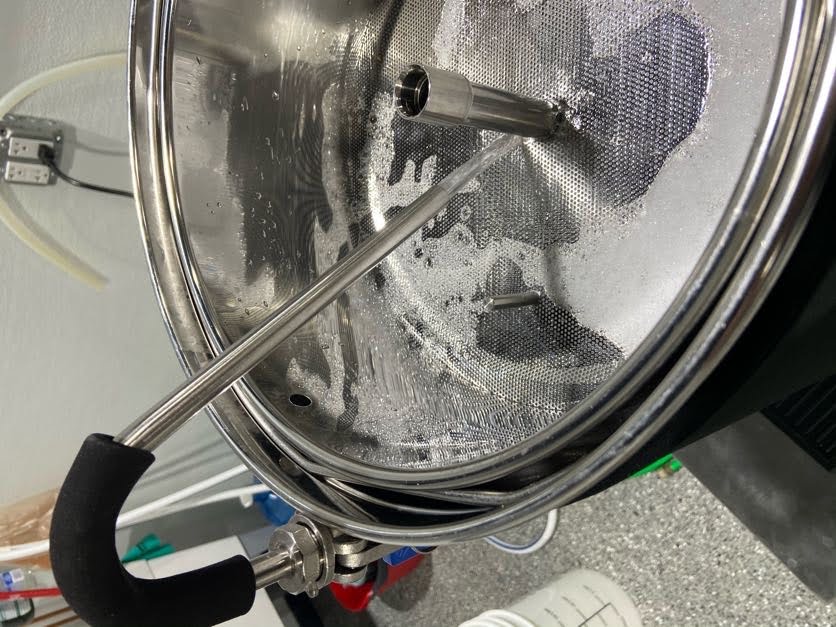
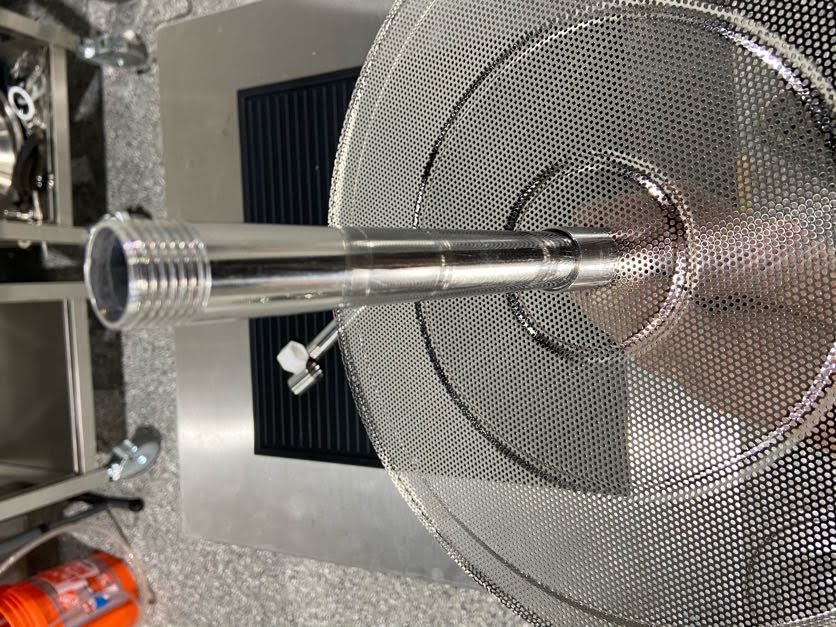
The upper screen for the grain basket will slide over the pipe.
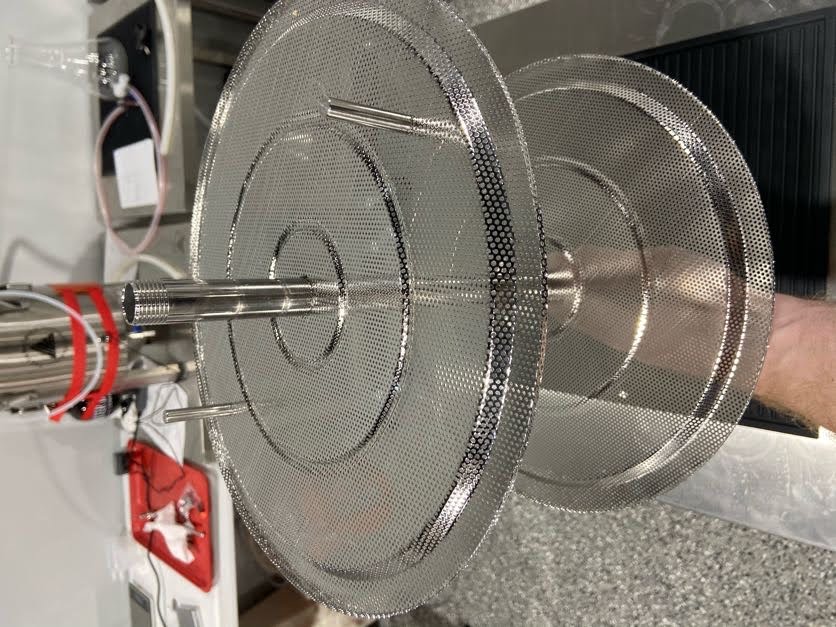
The handles for you upper screen are installed with a single screw (screws and handles provided)
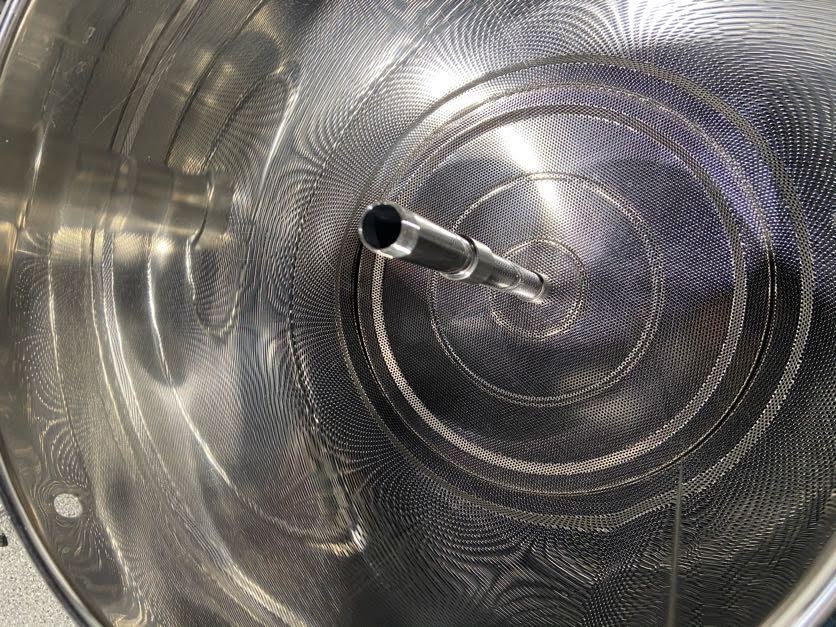
You will now have two pieces left over, a white plastic cap to cover your pipe while filling your unit with malt and a stainless ring to cover the threads while you mash.
The assembled screens and overflow pipe will now go into the grain basket and look like this.
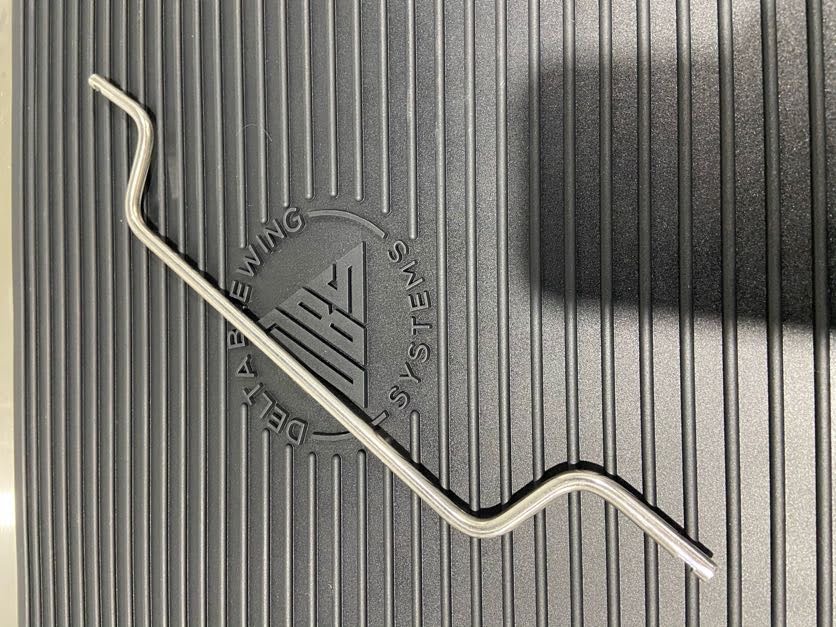
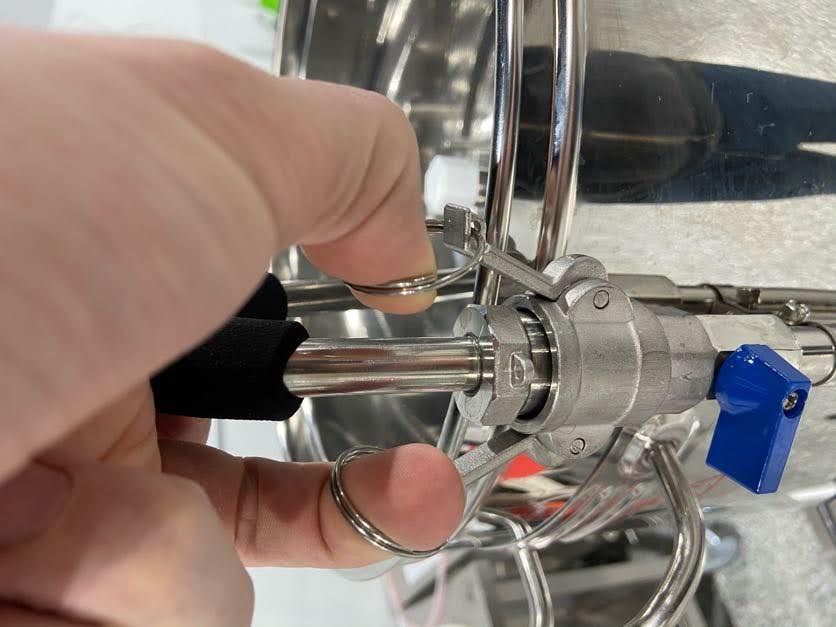
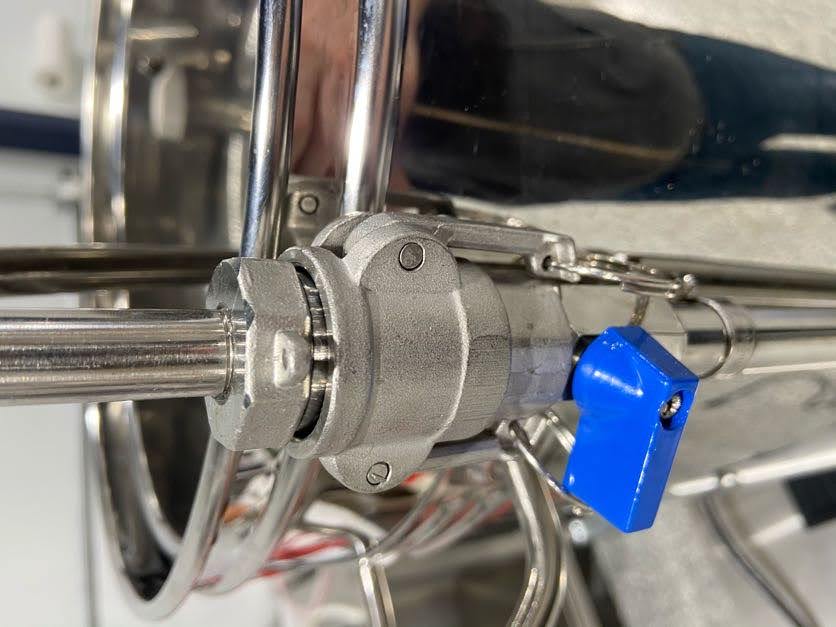
THE RECIRCULATION AND WHIRLPOOL ARMS
Both your recirculation and whirlpool arms (the stainless tubes with foam covers) are installed the same way. Lift up on the two key-rings while gently pressing down on the connecting end of your stainless arm into the connecting port of the pump arm just off to the side of the upper lip of your AIO unit.
Once you can feel that the connecting end of the arm is seated pull down on the key-rings and fully press in the locking arms.
Your connecting port has a gasket and should now have formed a nice watertight seal.
(The blue valve handle will be used to control the outgoing flow from the arms. The valve pointing to the side means its closed, the valve pointing down means its open.)
THE USER INTERFACE
Here we'll cover what is probably the most intimidating part of using an automated brewing system. It may look complicated at first glance, but the features of this system actually make it very easy to learn quickly as well as help you get your brew day over more quickly and efficiently.
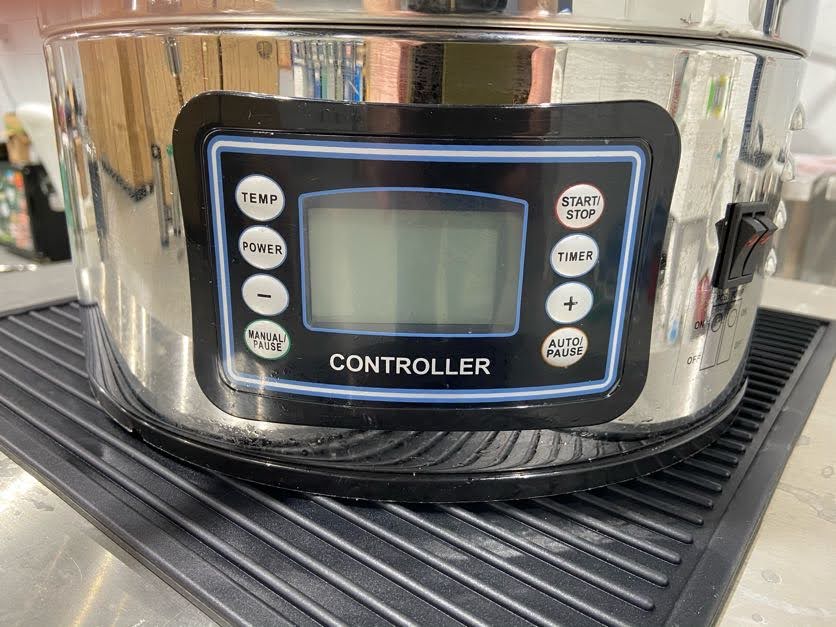
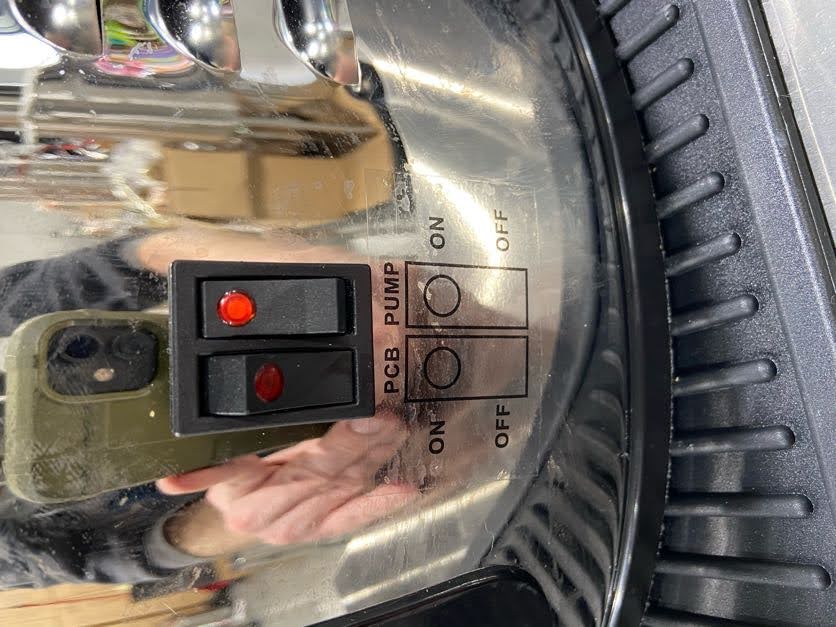
To turn on your interface, flip the PCB switch up. The red light will come on and your screen will light up.
You can run the pump without the screen on and vice versa.
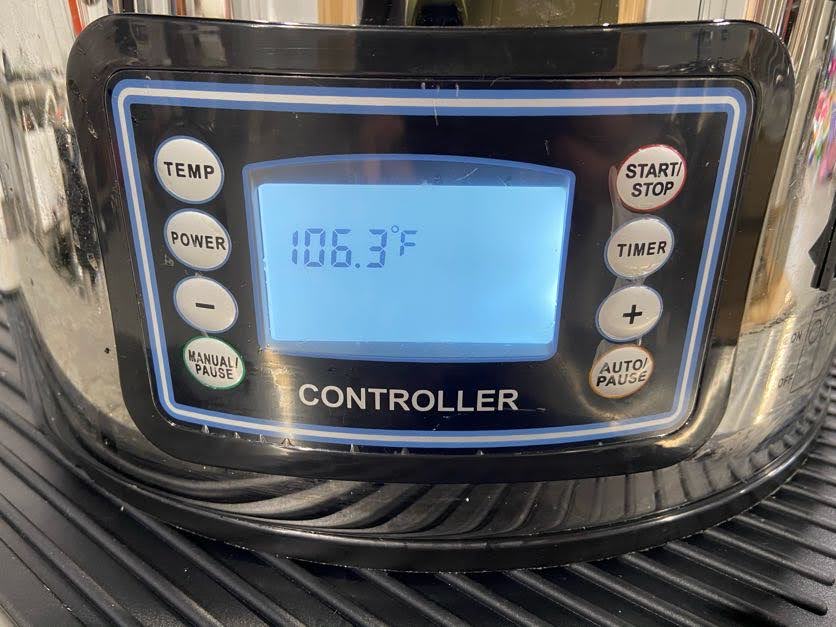
The first thing you should see is the temperature of the contents of the unit.
Now would be a good time to get a thermometer and get a 2nd temperature reading, this will let you know the accuracy of the temperature reading and calibrate it to the correct temperature which we'll cover shortly.
This first screen you see is actually the time to change your Temp from Celsius to Fahrenheit.
At this first screen, holding your TEMP button for 5 seconds will change the unit of measurement from Fahrenheit to Celsius or Celsius to Fahrenheit.
THE BUTTONS
Get to know these buttons, you'll be using them.
To start your process you'll at least need to get your desired temperature, power, and timer/s set before it will begin heating.
Let's cover the easiest setting first and probably the one I still you most (MANUAL)
The first button you'll press is "Manual/Pause"
This will bring up another screen showing you the current TEMPerature of the contents, the TIMER, and the POWER setting.
From this screen you can change the settings of those 3 categories by pressing the corresponding button just once.
That will take you to a screen where you can press + or - to set the the temperature, power, or time to fit the needs of your brew session.
To begin heating the contents of your AIO you'll need to set your
TIME - the length of time the unit will count down while maintaining your set TEMP.
Your temp can be aided by the setting of your POWER.
If you're quickly trying to heat your strike water or get your collected wort to a boil, set it to 1800w.
If you're trying to maintain a lower temperature such as 152f for a 60min mash session, set it to 900w and let it ride for the 60 mins.
(just make sure to monitor the flow from your recirculation arm)
The power setting can be adjusted in values of 100 from 1800w down to 100w.
The TEMP setting can be set anywhere from 77f to 212f (Boiling)
CALIBRATING THE TEMPERATURE
The units come pretty spot on as is when it comes to reading temps, but as brewers we like to make sure our temps are what they should be.
With a 2nd thermometer that you trust, check the temperature of the contents in your AIO unit and compare it to the temp reading on your AIO's screen.
If they match, congrats RDWHAHB!
If they don't match
-Press the + and - buttons together until the screen flashes C1/F1 and the temperature.
Raise or lower the temperature to where it needs to be.
If the actual reading is 9.3 degrees higher than what's being shown, raise your temp +9.3 degrees.
If the actual reading is 4.7 degrees lower than the shown value, lower it until it reads -4.7
(the used values are random for examples)
GETTING STARTED IN MANUAL MODE
To get started in MANUAL mode I'm going to run you through it as if we were performing a single infusion mash process for brewing beer.
Plug in your AIO unit somewhere where you don't think you'll be moving it from. I prefer somewhere lower as you'll eventually be lifting the basket and sparging/rinsing your grain.
From this first screen I'm going to assume you've read everything above and have your TEMPerature calibrated.
-Press MANUAL/PAUSE.
-Set your TEMP, POWER, and TIMER
Remember you'll be adding grain so set your Temp for higher than your desired mash temperature.
A simple mash is typically done around 152f for 60-90 mins.
-Set your power to 1800w
-Set your TIMER to your desired Mash session length (60min for this)
-Set your TEMP (I use a lot of malt so i tend to get my strike water into the lower 170f's before adding my grain and I typically fall very close to 152f.
Once you reach your desired strike water temperature, press MANUAL/PAUSE to pause the system so you can add your grain.
(Don't worry if your numbers don't fall exactly where they need to be. The grain is separated from the heating element and the unit keeps your TEMP stable throughout the mash with the aid of the recirculation arm.
At this point
- Turn your power down to 900w
- Turn your Temp down to 152f
- Reset your timer if it started counting down.
With those parameters all set, go ahead and press the button START/STOP.
If everything was done correctly you'll see the letter H flashing in the upper left hand corner. This indicates that the unit is heating the contents to your set TEMP and once it reaches that TEMP the TIMER will begin counting down and the unit will turn on the heating element as necessary to maintain your TEMP over the duration of the mash or boil.
Once you are satisfied that your mash session is complete, turn off the pump and give it a few seconds to drain back before closing the arm valve and removing the recirculation arm.
Find your grain basket handle and affix the notches into the holes on the side of the basket.
Carefully lift the basket and the contents above the unit and rest the four feet of the basket onto the small bars at the top of the unit.
The basket should comfortably rest on those bars, if it wobbles make sure all 4 feet are resting on the bars.
From here it is your choice to batch sparge or fly sparge.
You should have already heated your sparge water to around 168f-170f in another vessel while your AIO was mashing.
Sparge your mashed grains until you've collected the desired amount of wort.
Set your
-POWER back to 1800w
-TEMP to Boiling 212f
-TIMER back to your desired brew session length.
The unit will begin counting down once it has reached boiling temperature and you may enjoy your brew session.
If your wort is not boiling and the unit reads "Boiling" with the timer counting down: recalibrate your temperature, reset your time and try again.
Use your provided Hop Spider Basket when adding hop additions.
This helps to keep your pump from plugging up with hops if you choose to do a whirlpool after the boil.
At the end of your brew session, chill using the provided wort chiller which can be connected to either a pump with a cold water source or to a Delta Brewing Systems Glycol Chiller.
You can also use any variety of wort chiller you'd commonly find at a local brewing supply shop.
When ready, collect your treasure from the ball valve on the side of the unit between the pump arm and the user interface.
Use the valve handle to control the flow from the valve.
The unit comes with a bazooka screen to use that threads on to the internal side of the valve. The screen is optional to use and can definitely aid in the clarity of your beer by filtering out hop particles and trub.
I just don't suggest using the filter screen when brewing hoppy beers as even my larger Bazooka screen will plug up with hops very quickly.